iMovie included more tools after upgraded to 11.0 since 2010. Though it is an intelligent design, there have not many instructive guidelines for users, which make troubles for the users who don’t have much time to find out hidden and useful tips and tricks. Here are 20 useful iMovie tricks hidden in different functions, which will be useful for you to be an iMovie Expert. Please note that all italic words and phrases stand for function button in this article.
1. Integrated with Facebook – Edit Facebook Photos Directly
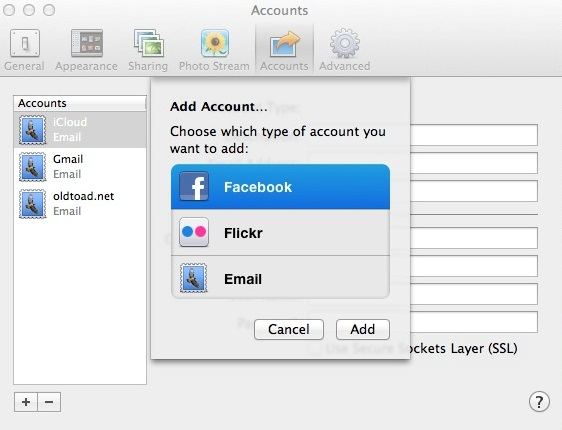
When importing video clips, sometimes, users want to use Facebook photos, because it’s boring and time-killing to download them one by one from online internet and then import to iMovie. The best way is to connect iPhoto with a Facebook account and allow it to sync user’s Facebook photos with iLife Media Browser, after that all Facebook photos can be used in all iLife tools including iMovie directly.
How to make it?
At first open iPhoto>Accounts>Login to Facebook and then select, allow syncing photos with iLife Media Browser.
2. Analyze Video – Finding People in Football Game
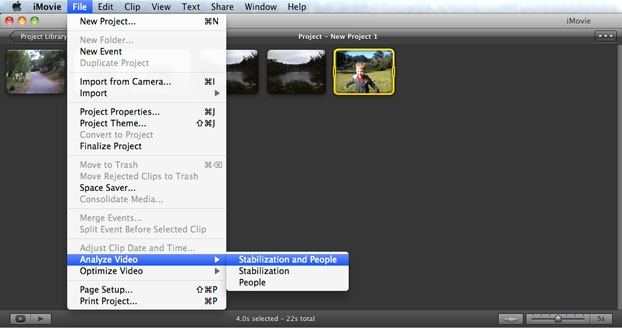
Analyze Video can smooth out jumpy and handheld video if it is recorded by mobile devices like iPhone 4, And it also can tag different people if user’s needs to edit a football game video. It may take several minutes to analyze depending on video size. But after it completes, users will save much time in editing.
How to activate it?
Select File> on the top>Analyze Video>Stabilization and People
3. Swap Events and Projects – Look Like Final Cut Pro
Though I don’t like it much, Mac users who prefer professional look can’t help using this sophisticate tool-Final Cut Pro. For those users, who can change the interface in Windows – > Swap Events and Projects, and then the Project Library will swift the position with Event and meanwhile Timeline will show on the top left, which is opposite to the standard interface of iMovie but much similar with FCP.
How to make it easily?
Click the shift button in the left corner of middle toolbar and you can swap events and projects with one click.
4. Switch Timeline to More Traditional Format – Give a Familiar Operating Timeline
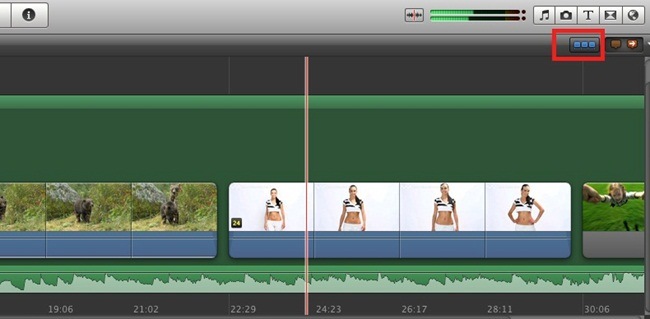
All Apple devices like to show how special they are in iMovie TimeLine. It doesn’t present clips in one long line but in stacks, which is much different from most video editing software. Generally, users can see the switch button on the top right corner of horizontal tool bar, which will be activated after users pick up Show Advanced Tools in iMovie >Preferences.
5. iMovie Drop Box – Import Multiple Files Once in a time
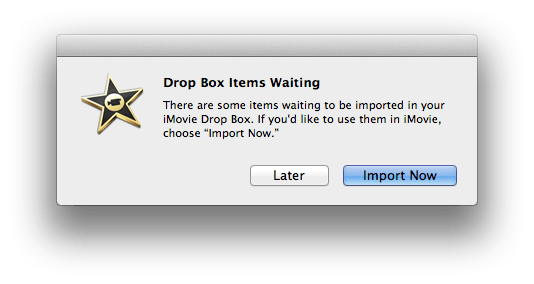
When using Drop Box, users can sync files in different devices as long as they log into the same account. iMovie Drop Box can play the same role in Mac. If users drag all clips before editing, it can sync all files to Library directly in the first time when open iMovie. The premise is users should download Drop Box, and then drag all media files in the Drop Box folder. This is the popup window to notice that users can choose Import Now to allow importing all files in Drop Box folder in bulk to iMovie.
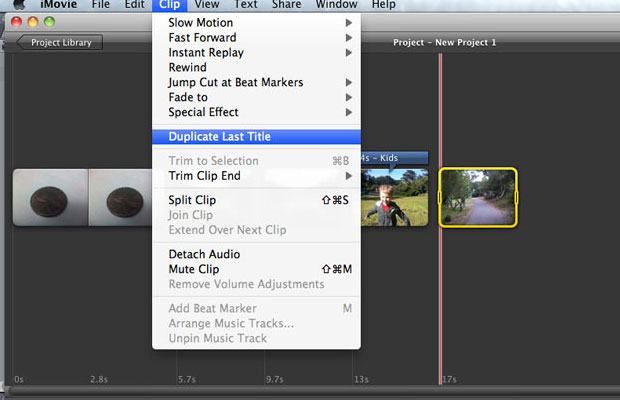
6. Duplicate Last Title – Add File Names in Bulk Rapidly
It is not easy to add titles for all clips, especially when users have more than one movie in timeline. Using Duplicate the Last Title function in Clip is the most efficient way to do it. From there all users have to edit is the text in each movie that is selected. Editing saves more time than adding and editing.
How to make it?
Go Clip>Duplicate Last Title
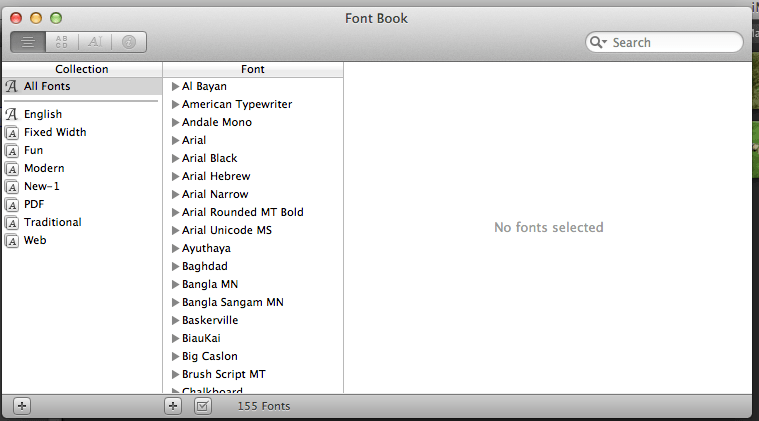
7. Font Book – Customize Font
For some web designers, colors and fonts play important roles in their daily work. Though iMovie contains some Art Fonts, users may need more customized fonts to enrich the work with iMovie Font Book, which can be found in Text > Show Fonts. This function will show all the fonts in Mac. Please note that the iMovie Font Panel won’t activate until users drag some Text Effect for clips. This is the Font Book in my Mac.
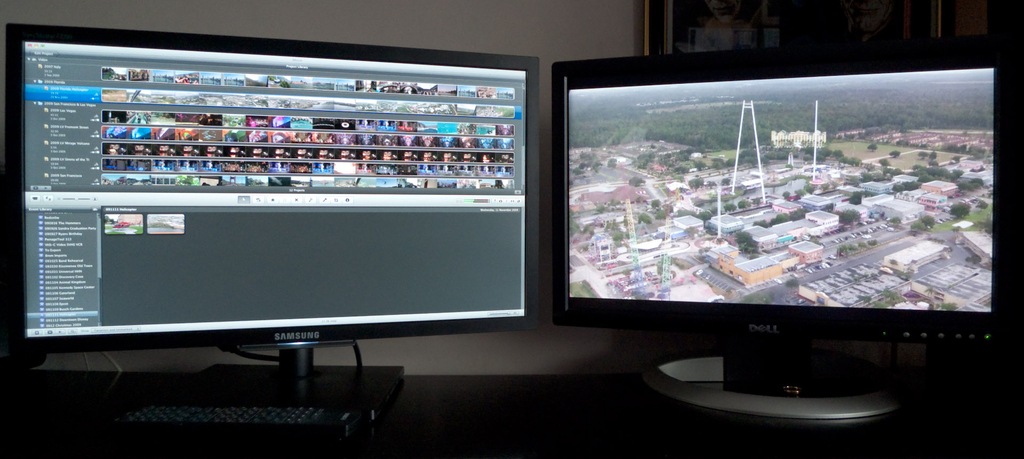
8. Viewer on Other Display – Display Edited Project in Second Monitor
Most users know Side-by-Side Display when two movies need to be edited at the same time, while few know that it’s able to show an edited project in second display. Just Select Windows > Viewer on Other Display (don’t forget to connect the second monitor at first), then users can get the entire top/bottom of the video displayed in two independent monitors with more details.
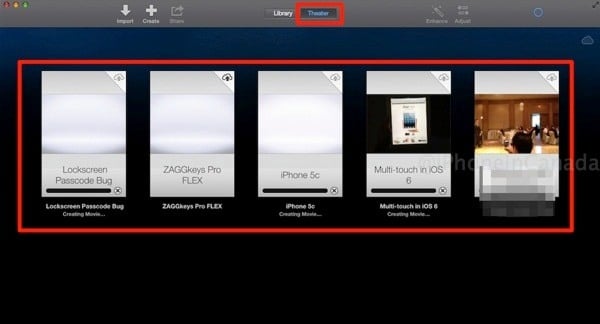
9. iMovie Theater – Transfer Files between Different Apple Devices
This is a common need for those who have more than one Apple devices. For users who have iPhone, iPad and Macbook, the first option is to share all edited video is iMovie Theater. While it has some restricts like it can only support 5GB storage. The best thing is users can present and transfer iMovie files freely between different Apple devices. Please note that iMovie Theater is built to work with iCloud, therefore users need to make sure that all devices can connected to the same iCloud account.
10. Reduce Background Noise
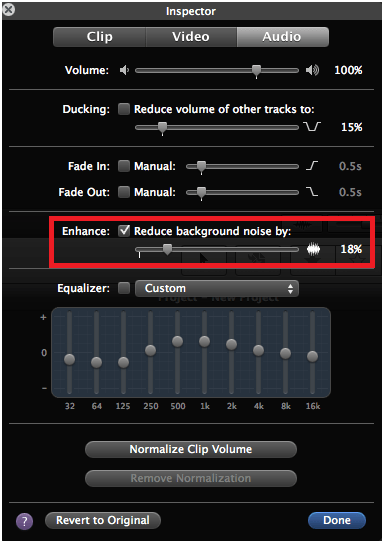
iMovie 11.0 pays much attention on Audio function. Users can use the Equalizer to balance the audio. While the best function for Audio Adjustment is Reduce Background Noise. Granted a user records a shot video on street, but he/she needs a quiet or mute background. This function can help a lot. Open Inspector (in middle of toolbar, with icon of i) >Audio >Pick up Enhance: Reduce background noise by: drag the percentage bar to achieve the best result, higher percentage means stronger noise reduction.
11. Reduce Motion Distortion
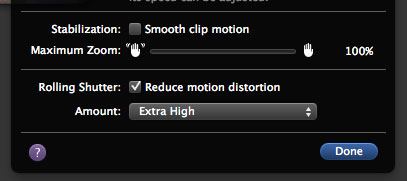
It is common to find wobbly videos recorded by most consumer camcorders because of CMOS sensor issue. While iMovie can tune in the not-perfect video if users choose to use High or Extra High of Reduce Motion Distortion in Inspector.
12. Maps, Backgrounds and Animatics – Clarify Movie Story
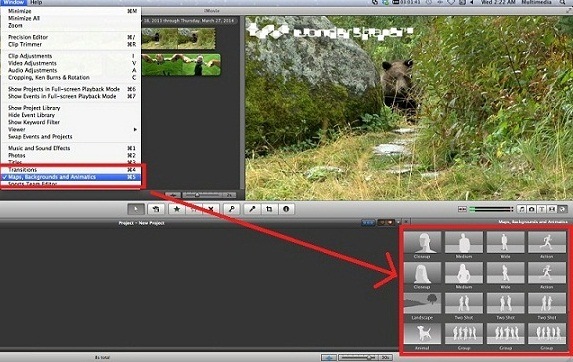
There are only 15 templates in iMovie 11.0, therefore if users want to change the template styles (templates in iMovie Trailers is not interchangeable), the function of Maps, Backgrounds and Animatics can be prior option. Draw the blueprint for movie story with Animatics in timeline and then replace them with real shots. This is a great way to organize thoughts and plan for footage that users don’t have enough time to shoot temporarily.
How to make it?
Go Windows >Maps, Backgrounds and Animatics >Drag the toolbar to the end and pick up the suitable Animatics as below.
13. Panorama Meets Ken Burns Effect
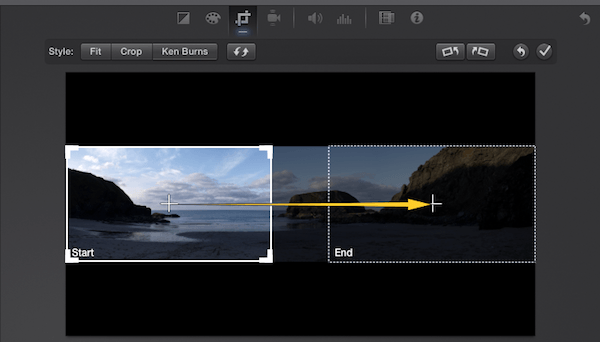
Ken Burns Effect works for a long time in iMovie, but it’s still new for panorama in iMovie 11.0. I hardly used panorama in iMovie actually until it upgraded. Insert a panorama into the timeline and apply the Ken Burns effect, it seems to easily pan across the scene, which presents a better preview result. Move the pointer to the image, click the gear button showing in the left corner, choose Fit, Crop, and Ken Burns > Ken Burns and then adjust the panorama to the suitable size with different editing tools.
14. Add Comment and Chapter Marker
After I picked up Show Advanced Tools (check tips 4), there will be two tools showing in the top right corner, i.e. Chapter Marker and Comment. Comment can be useful to add notes, while Chapter Marker supports drag video in a place that plans to mark as a chapter.
15. Pointer and Keyword
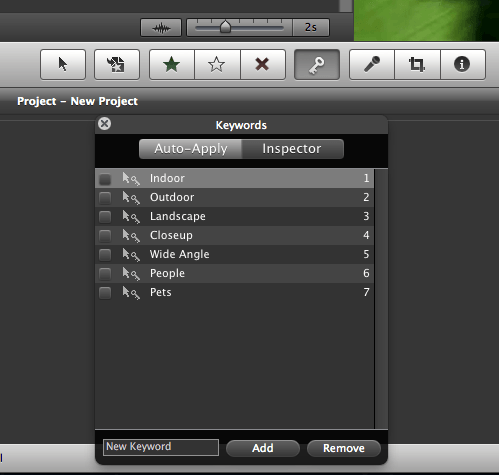
It is common sense to use the pointer to drag files in iMovie, but anyone knows that this pointer can stop any editing tools by one click? For Keyword, it can be highly helpful to organize complicate clips. Comment can be the additional aid for Keyword function when users need more details. Pointer and Keyword can found in the middle of tool bar with tilt arrow icon and key icon.
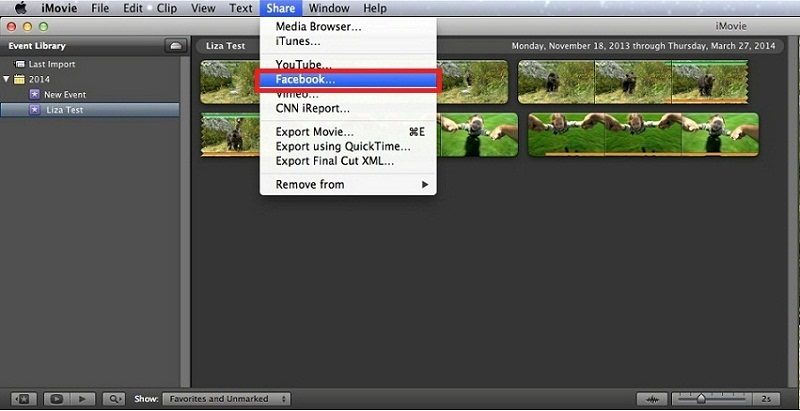
16. Share in Facebook – Get More Social Attention
iMovie starts to integrate with Facebook after upgraded. Saving for this, users can also share clips on YouTube, Vimeo, CNN, Media Browser and Desk. Actually in my opinion, if Twitter can support video very well, iMovie may take it into account in the near future.
How to activate it?
Go Share->Facebook->Log in to share directly.
17. Magic Trackpad – Beef Up iMovie Operating Skills
Magic Trackpad is not the embedded function of iMovie, while it can beef up operating skills if users can use it freely and efficiently. One of the main features of Apple Apps is to support multi touch gesture and there is no exception with iMovie.
Here is the basic gesture:
To add a clip to your project, go to the Event browser and use a three finger swipe up on your trackpad.
Move the cursor above the media and pinch your fingers open to expand and pinch your fingers closed to contract your view of the media.
Select the clip within your timeline, and use a three finger swipe to move it to the right or left.
18. Switch Video to Audio in Seconds
Most iMovie users know the way to detach audio from video directly after right-click. The cooler thing is users can switch video to audio and then from audio to video in seconds as long as dragging a clip below another one which is in different timeline as below.
19. How to create your own Pointer
Step #1:
Launch the PREVIEW app and open any picture. I recommend opening one with 16:9-aspect-ratios. This is a screen-grab of a video in this example.
Step #2:
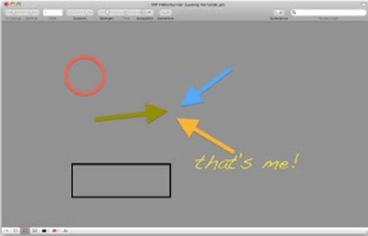
Select all (Apple-A) and hit backspace, an empty preview-picture created! Now on top of the window, you’ll notice a tool-bar, click on Annotations.
Step #3:
On the bottom-left, you’ll notice a small selection of tools like pointer, circle, box, text, color, thickness and font.
Now you can customize any kinds of pointers based on how many, what color, even your own text-design.
Step #4:
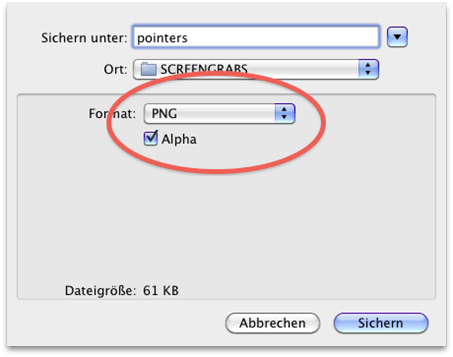
Save as PNG (or tiff), which allows the grey part to be transparent. Done!
20. iMovie Preferences
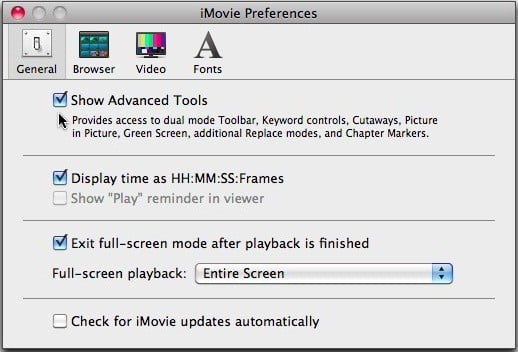
It is useful to work the toolbar, keyword, cut ways, picture in picture, green screen, and replace mode and chapter markers in iMovie.
How to make it?
First go to< iMovie preferences> then click all the options given in the below screenshot.
Further reading about iMovie, please check Everything You Want to Know about iMovie.Featured photo credit: iMovie/Apple via images.apple.com

